free ai for graphic design

Every Graphic Designer Should Know These 10 AI Tools | Free AI For Graphic Design | 2024

In the dynamic world of graphic design, staying ahead requires not just talent but also an understanding of the latest technologies. These free AI for graphic design models has emerged as a game-changer for graphic designers, providing innovative tools to enhance creativity and streamline workflows. In this blog post, we’ll explore 10 AI-powered sites that can transform your design experience, backed by examples and explanations of each.

1. RunwayML

RunwayML is a treasure trove for graphic designers looking to explore diverse machine-learning models for their artistic projects. From generating unique textures to creating interactive experiences, RunwayML opens up a world of possibilities, making AI accessible to designers of all skill levels.

Example: Style Transfer

Transform an ordinary photo into a work of art by applying artistic styles from famous paintings using RunwayML. Upload your image, select a style, and witness the AI’s ability to blend the two seamlessly.

2. OpenAI’s DALL-E

DALL-E from OpenAI is a groundbreaking model that generates awe-inspiring images based on textual descriptions. Describe your vision, and watch as DALL-E brings it to life, offering a new dimension to your creative process.

Example: Imaginative Image Generation

Describe a fantastical scene in text, such as “A surreal forest with floating trees,” and let DALL-E bring your description to life with an imaginative and unique image.

3. DeepDreamGenerator

Inject a surreal twist into your designs with DeepDreamGenerator. This AI-powered tool utilizes neural network art to transform your creations into mesmerizing, dreamlike visuals. Unleash your imagination and witness the magic of deep dreaming.

Example: Deep Dreamed Art

Experience the surreal beauty of neural network art by uploading your design to DeepDreamGenerator. The tool enhances and distorts your image, creating intricate and dreamlike patterns.

4. Designify

Designify_ is your go-to hub for AI-powered tools that provide instant design inspiration. Whether you need a quick boost for your project or want to explore fresh ideas, Designify_ makes the creative process seamless and efficient.

Example: AI-Inspired Design Suggestions

Explore AI-powered design suggestions on Designify_ for instant inspiration. Input your project details, and receive creative ideas and recommendations to elevate your design.

5. Artbreeder

Artbreeder leverages the power of genetic algorithms, allowing you to blend and evolve images effortlessly. Create unique visual compositions by tweaking and combining elements, making every design a work of art.

Example: Genetic Algorithm Image Evolution

Blend and evolve images effortlessly on Artbreeder. Start with a base image and experiment with sliders to create a unique composition, showcasing the power of genetic algorithms.

6. Remove.bg

Bid farewell to tedious background removal tasks with Remove.bg. This AI tool swiftly and accurately removes backgrounds, saving you time and enabling you to focus on the core of your design.

Example: Background Removal Precision

Save time on tedious tasks by using Remove.bg to accurately remove backgrounds from images. Focus on the subject of your design without the hassle of manual background removal.

7. colorisebot

Colorizebot breathes life into old photos by automatically adding vibrant colors. Give a fresh perspective to historical images or add a pop of color to your black-and-white designs with this intuitive and time-saving tool.

Example: Automatic Photo Colorization

Give an old black-and-white photo a vibrant makeover with colorise bot. Witness the automatic colorization of historical images, adding a new layer of depth and realism.

8. DeepArt.io

DeepArt.io lets you transform your designs into masterpieces inspired by famous artists. Apply the styles of iconic painters to your creations, adding a touch of artistic flair to your graphic design portfolio.

Example: Style Transformation

Apply the styles of renowned artists to your designs using DeepArt.io. Transform your artwork into a masterpiece reminiscent of famous artistic styles.

9. AI_Palette

Generate beautiful and harmonious color palettes effortlessly with AI_Palette. Enhance the visual appeal of your designs by exploring and incorporating expertly curated color schemes into your projects.

Example: Effortless Color Palette Generation

Generate beautiful and harmonious color palettes effortlessly with AI_Palette. Enhance the visual appeal of your designs by exploring and incorporating expertly curated color schemes.

10. ShapefactoryAI

Create stunning shapes and patterns with the magic of AI at ShapefactoryAI. Elevate your designs by experimenting with unique and intricate shapes, adding a touch of sophistication to your free ai for graphic design endeavors.

Example: AI-Generated Shapes and Patterns

Experiment with intricate shapes and patterns at ShapefactoryAI. Elevate your designs with unique elements that add sophistication and creativity to your graphic projects.

Scope For Freelancers – Free AI For Graphic Design

As a freelance graphic designer, you should experience free AI for graphic design, integrating AI tools into your skill set can open new doors and elevate your freelance career. Don’t even think that AI can overshadow your career, it’s just a machine language who in need of human prompts. A good prompt can take the game to the next level.

Here are some glimpse of examples you can adjust in your workflow.

  1. Efficiency and Productivity Boost:
    • Leverage AI tools to streamline repetitive tasks, allowing you to focus more on the creative aspects of your projects.
    • Increase productivity by automating time-consuming processes like background removal, color correction, and image enhancement.
  2. Diversified Service Offerings:
    • Expand your services by incorporating free AI for graphic design, offering clients cutting-edge solutions that set you apart from competitors.
    • Integrate AI-generated elements seamlessly into your designs, providing unique and innovative deliverables.
  3. Cost-Effective Solutions: Free AI for graphic design
    • Deliver high-quality designs at competitive prices by utilizing AI tools that reduce manual effort and save time.
    • Provide clients with cost-effective alternatives for various design needs, enhancing your market competitiveness.
  4. Client Satisfaction and Innovation: Free AI for graphic design
    • Impress clients with AI-enhanced designs that demonstrate a commitment to staying at the forefront of design trends.
    • Use AI for rapid prototyping and ideation, fostering an innovative approach that resonates with clients seeking fresh and dynamic design solutions.
  5. Adaptability and Skill Development:
    • Showcase your adaptability by staying informed about the latest AI tools and trends in the graphic design landscape.
    • Continue refining your skills through continuous learning, ensuring you stay ahead in an ever-evolving technological landscape.
  6. Collaboration Opportunities: Free AI for graphic design
    • Collaborate with AI developers, fellow designers, and businesses looking to harness the power of AI in design projects.
    • Position yourself as a freelancer capable of bridging the gap between traditional design and cutting-edge AI applications.
  7. Market Differentiation: Free AI for graphic design
    • Market yourself as a freelance designer who integrates AI seamlessly into creative workflows.
    • Highlight the efficiency gains and innovative solutions that AI brings to your projects, attracting clients looking for forward-thinking design professionals.
  8. Global Reach and Remote Collaboration:
    • Capitalize on the ability to collaborate remotely with clients and AI experts worldwide.
    • Offer your freelance services on global platforms, reaching a broader audience and diversifying your clientele.

FAQs

[sp_easyaccordion id=”1491″]
Video Editor Interview

Top 31 Video Editor Interview Questions and Expert Answers | Mastering the Reel

In the dynamic world of video production, the role of a video editor is crucial in bringing the creative vision to life. So, we have compiled top Video Editor Interview Questions and Answers which are comprehensive for any kind of scenario. Aspiring video editors often find themselves facing a barrage of challenging questions during interviews. Whether you’re a seasoned professional or a newcomer to the industry, it’s essential to be well-prepared for these video editor interview questions. In this blog post, we’ll explore some common video editor interview questions and provide expert answers to help you ace your next interview.

Can you walk us through your video editing process?Video Editor Interview

Answer: I typically start by thoroughly reviewing the raw footage to understand the project’s narrative and tone. Then, I create a rough cut, ensuring the pacing aligns with the director’s vision. I collaborate closely with other team members, incorporating feedback to refine the edit. Finally, I focus on adding transitions, effects, and sound design to enhance the overall viewing experience.

What video editing software are you most comfortable using, and why?

Answer: I am proficient in industry-standard software such as Adobe Premiere Pro and Final Cut Pro. These platforms offer robust features, a user-friendly interface, and compatibility with various file formats. My choice depends on the project requirements, as both software options provide the tools needed to deliver high-quality edits.

How do you stay updated on the latest video editing trends and technologies?

Answer: I am an avid learner and stay connected with online communities, attend industry conferences, and subscribe to relevant blogs and YouTube channels. Additionally, I actively participate in online forums and engage in discussions with fellow professionals. This keeps me informed about the latest trends, software updates, and emerging technologies in the field of video editing.

Describe a challenging project you’ve worked on and how you overcame obstacles.

Answer: One notable project involved tight deadlines and a large volume of footage. To manage this, I created a detailed timeline, prioritized tasks, and maintained open communication with the team. Additionally, I utilized efficient editing techniques, such as proxy editing, to streamline the workflow without compromising on the quality of the final product.

How do you handle constructive criticism of your work?

Answer: Constructive criticism is invaluable for growth. I approach it with an open mind, viewing it as an opportunity to refine my skills. I actively seek feedback throughout the editing process and make necessary adjustments to align with the project’s objectives. This collaborative approach ensures the final product meets or exceeds expectations.

What is your approach to storytelling through video editing?

Answer: Storytelling is at the heart of video editing. I focus on creating a seamless narrative flow by establishing a strong connection between shots, maintaining pacing, and using visual and auditory elements to evoke the desired emotions. I pay meticulous attention to detail, ensuring that each edit serves the overarching story.

How do you handle tight deadlines and high-pressure situations?

Answer: I thrive under pressure and prioritize tasks strategically. To meet tight deadlines, I break down the project into manageable segments, delegate responsibilities when possible, and maintain clear communication with the team. Additionally, I am well-versed in time-saving techniques within my editing software, allowing me to deliver quality work within the specified timeframe.

How do you collaborate with other team members, such as directors, cinematographers, and sound designers?

Answer: Collaboration is key to a successful project. I actively participate in pre-production meetings to align with the director’s vision. During editing, I maintain open communication with cinematographers to understand the intended visual style and work closely with sound designers to synchronize audio elements seamlessly. This collaborative approach ensures that all creative elements harmonize to tell a compelling story.

Can you share an example of a project where you had to think outside the box creatively?

Answer: In a documentary project, I faced the challenge of presenting a complex narrative in a visually engaging way. To address this, I experimented with non-linear storytelling techniques, incorporated unique visual effects, and used sound design to enhance the storytelling. This unconventional approach added depth to the project and garnered positive feedback from both the audience and the project stakeholders.

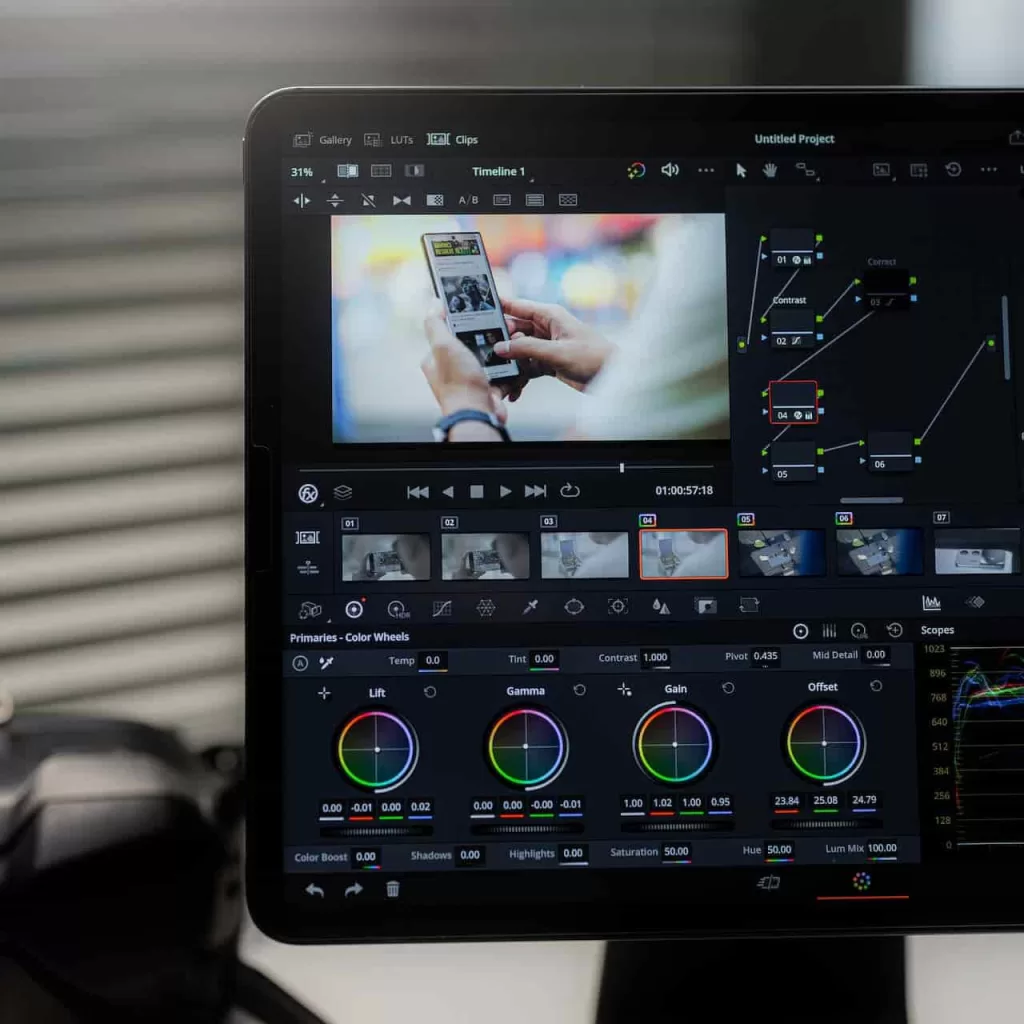
How do you approach color grading, and how does it contribute to the overall storytelling?

Answer: Color grading is a crucial aspect of video editing that significantly impacts the mood and tone of a piece. I approach color grading by first understanding the emotional beats of the story.

I use color to evoke specific emotions and create visual consistency throughout the project. Whether it’s enhancing the warmth of a scene or creating a cool, desaturated look, color grading plays a pivotal role in conveying the intended atmosphere.

What is your experience with incorporating visual effects (VFX) into your edits?Video Editor Interview

Answer: I have experience working with various visual effects tools and techniques. When incorporating VFX, I collaborate closely with VFX artists to seamlessly integrate effects into the footage. I ensure that visual effects enhance the narrative without overshadowing the storytelling. This involves meticulous attention to detail, color matching, and frame-by-frame precision to create a cohesive and realistic visual experience.

How do you adapt your editing style to different genres, such as documentaries, commercials, or narrative films?

Answer: Each genre has its unique storytelling requirements. For documentaries, I focus on creating a natural, authentic flow that captures real moments. In commercials, I emphasize concise storytelling and dynamic visuals to engage the audience quickly. For narrative films, I pay attention to character development, pacing, and visual continuity to immerse viewers in the fictional world. Adapting my editing style to the specific needs of each genre is essential for delivering impactful and resonant content.

What steps do you take to ensure your edits are accessible to diverse audiences?

Answer: Accessibility is a priority in modern video editing. I ensure that my edits consider diverse audiences by incorporating subtitles for the hearing impaired, using clear visual cues for important information, and optimizing for various screen sizes and resolutions. By keeping accessibility in mind, I aim to make the content inclusive and enjoyable for a wide range of viewers.

How do you manage large-scale projects with multiple editors or collaborators?Video Editor Interview

Answer: Communication and organization are paramount in managing collaborative projects. I establish clear communication channels, set project milestones, and use collaborative tools within the editing software to track changes and maintain version control. Regular team meetings and feedback sessions ensure that everyone is on the same page, contributing to a cohesive and unified final product.

Can you share an experience where you had to troubleshoot technical issues during the editing process?

Answer: Technical issues are inevitable, and problem-solving is a crucial skill. In a recent project, I encountered compatibility issues with a specific file format. I quickly researched and implemented a workaround, ensuring a smooth editing process. Being familiar with various troubleshooting techniques, staying updated on software updates, and having a reliable backup system are all essential components of managing technical challenges effectively.

How do you approach storytelling in short-form content, such as social media videos or advertisements?

Answer: Short-form content demands a concise and impactful storytelling approach. I focus on capturing attention within the first few seconds, ensuring that the narrative is clear and compelling. Every shot and edit must serve the primary message, and pacing is crucial to maintain viewer engagement in a limited time frame.

What role does music play in your editing process, and how do you select the right soundtrack for a project?

Answer: Music is a powerful tool for enhancing emotions and reinforcing the narrative. I carefully select soundtracks that complement the tone of the video, considering factors like tempo, mood, and cultural relevance. Collaborating with composers or music libraries helps to find or create the perfect soundtrack that enhances the viewer’s emotional connection to the content.

How do you manage revisions and client feedback during the editing process?

Answer: Clear communication is essential when handling revisions and feedback. I actively involve clients throughout the editing process, providing regular updates and draft reviews. By understanding their vision and expectations early on, I minimize the need for major revisions. When feedback is received, I approach it with an open mind, addressing specific concerns and ensuring the final edit aligns with the client’s goals.

What is your strategy for maintaining creativity and avoiding burnout during long editing sessions?

Answer: Maintaining creativity during extended editing sessions is crucial. I incorporate short breaks to refresh my mind, practice mindfulness techniques, and listen to music or take a walk to reset. Additionally, varying the types of projects I work on helps prevent monotony, keeping the creative juices flowing. Balancing intensity with breaks is essential for sustained creativity and avoiding burnout.

Can you share an example of a project where you had to adapt to unexpected changes or challenges?

Answer: In a fast-paced documentary project, unexpected weather conditions disrupted our original shooting plan. To adapt, I collaborated with the production team to devise a new strategy, reshooting scenes with available resources. This experience reinforced the importance of flexibility in the editing process, allowing me to adapt to unforeseen challenges without compromising the quality of the final product.

How do you approach organizing and managing a large volume of media files efficiently?

Answer: Organization is the backbone of efficient video editing. I use a systematic file naming convention, organize assets into clearly labeled folders, and utilize metadata tagging within the editing software. This meticulous approach streamlines the editing process, reduces search time, and ensures a smooth workflow, especially when dealing with extensive media libraries.

What is your experience with incorporating motion graphics and animation into video edits?

Answer: Motion graphics and animation can add a dynamic and engaging dimension to video edits. I collaborate with motion graphic designers to seamlessly integrate graphics that enhance the storytelling. Whether it’s lower thirds, transitions, or visual effects, I ensure that motion graphics are used judiciously to convey information effectively without overwhelming the viewer.

How do you approach balancing creativity with client expectations and project constraints?

Answer: Balancing creativity with client expectations requires effective communication and a deep understanding of the project’s goals. I start by aligning with the client’s vision in pre-production discussions. Throughout the editing process, I provide regular updates and seek feedback to ensure alignment. If creative differences arise, I present alternative solutions that address both artistic considerations and client requirements, fostering a collaborative and successful outcome.

How do you handle working with footage that is not of the highest quality? Video Editor Interview

Answer: Working with lower-quality footage is a common challenge. I employ various techniques such as color correction, noise reduction, and strategic editing to enhance the visual quality. If necessary, I communicate with the production team to explore potential reshoots or alternative solutions to improve the overall visual appeal of the final edit.

What role does storytelling play in video editing, and how do you ensure a cohesive narrative throughout the project?

Answer: Storytelling is the backbone of effective video editing. I focus on maintaining a clear narrative structure by establishing a compelling beginning, middle, and end. Each edit serves to progress the story, and I pay attention to continuity, ensuring that the audience remains immersed in the narrative without distraction.

How do you stay organized when working on multiple projects simultaneously?

Answer: Managing multiple projects requires meticulous organization. I use project management tools, create detailed schedules, and prioritize tasks based on deadlines and project complexities. Regular check-ins with the project team help ensure that each project is progressing smoothly, and I allocate dedicated time for each to maintain focus and quality.

Can you share your experience with color theory and how it influences your color grading decisions?

Answer: Color theory is fundamental to effective color grading. I consider the emotional impact of colors and their symbolism in different cultures. Warm tones may evoke a sense of comfort, while cooler tones might create a more somber mood. By applying color theory principles, I enhance the visual storytelling and contribute to the overall emotional resonance of the project.

How do you approach editing for different platforms, such as YouTube, Instagram, and television?

Answer: Each platform has its unique specifications and audience expectations. For YouTube, I focus on engaging content within the first few seconds to capture viewers’ attention. Instagram requires concise storytelling due to shorter attention spans. Television editing may involve adhering to specific broadcast standards. Adapting the editing style to suit each platform ensures the content is optimized for the intended audience and platform requirements.

What role does feedback play in your editing process, and how do you handle conflicting feedback from various stakeholders?

Answer: Feedback is invaluable for refining the editing process. I actively seek input from various stakeholders, including directors, producers, and clients. In the case of conflicting feedback, I initiate open discussions to understand each stakeholder’s perspective. Through clear communication and compromise, I aim to find solutions that address concerns while maintaining the integrity of the edit.

How do you keep up with the latest video editing trends and industry updates?

Answer: Staying current with industry trends is essential. I regularly follow industry publications, blogs, and forums to stay informed about the latest advancements. Attending industry conferences, workshops, and webinars also provides networking opportunities and insights into emerging technologies. This commitment to continuous learning ensures that my skills remain relevant in a rapidly evolving field.

What role does pacing play in your editing decisions, and how do you determine the appropriate rhythm for a project?

Answer: Pacing is a critical element in video editing. I tailor the pacing to the project’s genre, tone, and intended emotional impact. Action sequences may require faster cuts to build excitement, while dramatic moments benefit from slower, deliberate pacing. Through a combination of visual and auditory cues, I create a rhythmic flow that enhances the viewer’s engagement with the content.

“CONFIDENCE”

Your video editor interview depends 40% on these above questions and 60% on your confidence in how fluently you present your knowledge. Don’t panic at all, there are so many tricks if you follow then you can qualify for your video editing interview without much advanced knowledge.

As you prepare for your video editor interview, keep in mind the diversity of topics and skills that may be covered. These additional questions address specific areas such as handling lower-quality footage, adapting to different platforms, and managing conflicting feedback. Tailor your responses to reflect your unique experiences and strengths, and approach the interview with confidence and a passion for storytelling through video editing. Good luck!

logo designer

Top 5 logo designers on Fiverr

These 5 logo designers are so much creative that even Fiverr is also their client. You can discuss them all working on a logo and also share a sample.

Mijal

A logo designer with 14 years of experience who is passionate about her job and committed to delivering high-quality designs. She emphasizes her strong communication skills and ability to understand and meet her clients’ needs. With a background in working for agencies, she has a good understanding of branding and marketing. She offers an extensive portfolio for potential clients to review and are open to providing additional samples if needed. She also encourages potential clients to read their reviews to gain insight into their reputation and the satisfaction of previous clients.

David D

A talented logo designer who specializes in creating brands, campaigns, and digital projects for businesses of various sizes. He has experience working on diverse projects, ranging from comprehensive branding initiatives to corporate websites and even simple e-mail newsletters. The designer takes pride in his ability to deliver visually appealing and strategically effective end products, regardless of the project’s scale. His focus is on creating compelling designs that align with the client’s objectives and make a positive impact.

Oliver

An individual logo designer who has a deep passion for creativity and a keen eye for aesthetics. He has mastered the art of translating ideas into captivating visual representations. His proficiency spans various design disciplines, including logo design, branding, illustration, and digital art. What sets him apart is his unwavering commitment to quality and client satisfaction. He works closely with clients to understand their unique visions and objectives. By combining his technical skills with a strategic mindset, he consistently delivers designs that exceed expectations.

Iylana N.

Logo designer with an award-winning background in national advertising and marketing. She will create all the various alternates you may need as well as a social media profile pic version, a horizontal version, etc. Files for all orders will be delivered in eps, jpg, and png. You will also receive a one page pdf that contains the color codes and font name used. She offers to set up a custom order to ensure that the client gets exactly what they want. The designer looks forward to working on the client’s brand with enthusiasm and anticipation, indicating her excitement for the upcoming collaboration.

Anwar

A skillful logo designer with over 20 years of experience in various creative fields, such as logo design, packaging design, illustration, 3D modeling, surrealism painting, and photography. He mentions using software like Adobe, Macromedia, and Autodesk, including Photoshop, Illustrator, Premiere, and others, to create his designs. He encourages anyone interested in working on a project with him to reach out and contact him first.

Criteria to select Fiverr choice logo designer

When selecting a logo designer on Fiverr, it’s important to consider several criteria to ensure you find the right professional for your needs. Here are some factors to consider:

  1. Portfolio: Review the designer’s portfolio to assess the quality and style of their previous work. Look for versatility and a strong sense of creativity that aligns with your brand’s aesthetic.
  2. Reviews and ratings: Check the designer’s ratings and read reviews from previous clients. This will give you insights into their professionalism, communication skills, and the overall satisfaction of their customers.
  3. Expertise and specialization: Determine if the designer specializes in logo design or has a strong background in branding and visual identity. Look for experience in creating logos for businesses similar to yours or in your industry.
  4. Communication and responsiveness: Effective communication is vital for a successful collaboration. Check if the designer is responsive, attentive to your needs, and open to revisions or feedback. Clear and prompt communication will help ensure your vision is accurately translated into the logo.
  5. Turnaround time: Assess the designer’s estimated delivery time for logo designs. Make sure their timeline aligns with your project’s requirements and deadlines.
  6. Pricing and packages: Evaluate the designer’s pricing structure and packages to see if they fit within your budget. Consider the value they offer in terms of revisions, file formats, and additional services like brand guidelines or social media assets.
  7. Additional services: Determine if the designer provides any extra services such as vectorization, mockups, or multiple variations of the logo. These can add value and save you time and effort in the long run.
  8. Communication style: Look for a designer who asks questions and seeks to understand your brand, target audience, and design preferences. A collaborative approach will ensure the final logo meets your expectations.
  9. Copyright and ownership: Clarify the designer’s policy regarding copyright and ownership of the final logo. Ensure that you will have the right to use and modify the logo as needed without any restrictions.
  10. Personal fit: Trust your intuition and consider whether you feel comfortable working with the designer. A good working relationship can contribute to a more enjoyable and productive experience.

By considering these criteria, you can select a logo designer on Fiverr who is not only skilled and reliable but also understands your brand and can create a logo that effectively represents your business.

WORDPRESS

Best 5 WordPress web designers on Fiverr

These 5 are the best WordPress web service providers on Fiverr having a pro badge. You can easily discuss your website with them.

Asim

A skillful software Engineer and Certified Pro Web designer with 9 years of experience. Asim runs a small agency with a dedicated and professional team. They offer services to create websites, blogs, and e-commerce stores. They are capable of building websites from scratch or redesigning existing sites using platforms like WordPress or Shopify. Asim and the team are open to working with clients and establishing long-term relationships.

Yanislav K.

Yanislav, who has been passionately creating WordPress websites for the past 10 years as both a full-time job and a personal interest. Yanislav has successfully completed over 500 WordPress projects on Fiverr. He offers a comprehensive website building package that includes design and development, and he does it all with a smile. Additionally, Yanislav has a Bachelor’s degree in Marketing, which allows him to create visually appealing websites that are also effective in converting visitors. He prefers clean and simple designs, believing that less is more. Yanislav encourages anyone with questions or custom orders to reach out to him.

Dinos

An innovative web developer the head of a talented group of WordPress professionals. Their primary focus lies in crafting contemporary and outcome-oriented informational WordPress websites. They are located in Greece, following a successful five-year stint in Miami and an impressive fourteen-year presence in London. Their extensive experience in these diverse locations has honed their skills and enabled them to excel in delivering exceptional WordPress solutions.

with this gig, you can expect a new version of your website, with the following:

  • Mobile Responsive
  • Best of class Elementor suite
  • Fully Editable
  • SEO Optimized
  • Secure
  • Tailored for your Audience
  • High Quality & On Time

Waqas A

A software Engineer and tech enthusiast with 10 years of experience in WordPress. Waqas has completed over 1,000 successful projects on Fiverr. His expertise lies in helping businesses enhance their online presence through modern and up-to-date websites. He offers a comprehensive range of services including website creation, search engine optimization, marketing, A/B testing, brand building, eCommerce solutions, and conversion rate optimization. Waqas prides himself on building top-notch website designs, setting him apart from others. He welcomes inquiries and custom orders from potential clients.

Zobaair

A Professional Graphics and Web designer with a bachelor’s degree in computer science who has been working with WordPress on a near-daily basis since 2012 and have helped many local clients with their websites, having a keen eye on what makes for an excellent frontend user experience. He loves to help people, solve their problems and bring a smile to their faces.

Depending on the plan you choose you will get the following

  • Highly professional and responsive design on all devices.
  • All browsers compatible
  • SEO Friendly
  • Full website creation
  • E-commerce with payment integrations
  • Social media integration

Criteria to select pro seller – WordPress web developer

  1. Performance: Pro sellers need to demonstrate exceptional performance and maintain high-quality standards in their work. This includes consistently delivering high-quality services, meeting deadlines, and receiving positive reviews from clients.
  2. Experience: Pro sellers are expected to have a significant level of experience in their field. They should have a proven track record of successfully completing a substantial number of projects related to their expertise.
  3. Skillset: Pro sellers should possess advanced skills and expertise in their chosen category or service. They need to showcase a deep understanding of their field and demonstrate the ability to deliver exceptional results.
  4. Reputation: Building a strong reputation is crucial for becoming a pro seller. Positive feedback from clients, high ratings, and a solid portfolio of past work play a significant role in establishing credibility and trustworthiness.
  5. Customer Service: Pro sellers are expected to provide excellent customer service. This includes promptly responding to client inquiries, addressing concerns, and maintaining open communication throughout the project.
  6. Proven Results: Pro sellers should be able to demonstrate tangible results and showcase successful projects they have completed. This may include sharing case studies, testimonials, or examples of their work that highlight their expertise and achievements.
  7. Proactive Engagement: Pro sellers should actively engage with the Fiverr community, participate in relevant discussions, and contribute valuable insights. They should showcase their expertise and willingness to help others in the community.

It’s important to note that Fiverr has specific criteria and a review process in place to evaluate sellers for the “Pro” status. The exact requirements may vary depending on the specific category and services offered.

How long does it take to learn WordPress (2)

What is freelance copywriting?


Freelance copywriting refers to the practice of providing writing services on a freelance basis specifically for advertising and marketing purposes. Copywriters are responsible for creating persuasive and compelling content, known as “copy,” that aims to promote a product, service, or brand and ultimately persuade readers or viewers to take a specific action, such as making a purchase or subscribing to a newsletter.

As freelance copywriters, individuals work independently, often on a project-by-project basis, rather than being employed full-time by a single company or agency. They may collaborate with clients directly or work through intermediary platforms that connect freelancers with businesses seeking copywriting services.

Freelance copywriters may be involved in various types of projects, including writing website copy, sales letters, product descriptions, email marketing campaigns, social media posts, blog articles, advertisements, and more. They need to understand the target audience, communicate the brand’s message effectively, and employ persuasive language and techniques to engage and motivate readers.

Freelancing offers copywriters the flexibility to choose their clients, set their rates, and work on projects that align with their interests and skills. It requires self-discipline, strong writing abilities, creativity, and the ability to meet deadlines while satisfying client requirements. Successful freelance copywriters often build a portfolio of their work to showcase their expertise and attract new clients.

Copywrite vs Copyright

“Copywrite” and “copyright” are two different terms that refer to distinct concepts.

  1. Copywrite: The term “copywrite” is a common misspelling or confusion with the correct term “copywriting.” Copywriting refers to the act or profession of writing persuasive and compelling advertising or promotional content. It involves creating engaging copy that captures attention, communicates effectively, and motivates readers to take a desired action, such as making a purchase or subscribing to a service. Copywriters are skilled in crafting messages that resonate with a target audience and help achieve marketing objectives.
  2. Copyright: Copyright is a legal concept that grants exclusive rights to the creators of original works, such as literature, art, music, or software. It provides the creators with control over how their work is used, reproduced, distributed, or displayed. Copyright automatically applies to a work as soon as it is created and fixed in a tangible form (e.g., written down or recorded). This means that the creator holds the rights to their work and has the authority to determine how it can be used by others. Copyright protection generally lasts for the creator’s lifetime plus a certain number of years after their death, depending on the jurisdiction.

In summary, copywriting refers to the act of writing persuasive advertising or promotional content, while copyright is a legal concept that grants exclusive rights to creators of original works.

charge for video editing

How much to charge for video editing- Best Technique

The charge for video editing services can vary widely depending on various factors such as the complexity of the project, the duration of the footage, the level of expertise required, the deadline, and the market rates in your region. Here are some common methods used to determine pricing for video editing:

Hourly Rate:

Many video editors charge an hourly rate, which can range from $25 to $150 or more per hour, depending on their experience and the specific requirements of the project.

Per-minute Rate: charge for video editing

Some editors charge based on the duration of the final edited video. Rates can vary, but a typical range is between $50 to $500 per finished minute. This method is commonly used for commercial projects, documentaries, or longer videos.

Project-based Rate:

For larger projects, such as corporate videos, commercials, or films, it is common to negotiate a flat fee based on the scope of work, complexity, and estimated time required. The price can vary significantly based on the project’s requirements and the editor’s expertise, but it could range from a few hundred dollars to several thousand.

Retainer Fee:

For ongoing video editing work or long-term collaborations, some editors may charge for video editing a monthly retainer fee. This fee ensures that the editor is available for a set number of hours or projects per month and can be more cost effective for clients who require regular editing services.

It’s important to consider your level of experience, the quality of your work, and the local market rates when determining your pricing. Researching what other video editors in your area charge for similar services can provide a baseline for your pricing structure. Additionally, it’s crucial to clearly communicate with your clients about their specific requirements and budget to reach a mutually beneficial agreement.

Monthly Projects- Charge for video editing

Engaging in monthly video editing projects offers a range of benefits, including skill development, creative expression, portfolio building, feedback and improvement, networking opportunities, enhanced technical proficiency, and personal growth.

Consistent Content Creation:

By undertaking monthly video editing projects, you establish a regular content creation schedule. This consistency helps you develop your skills, maintain an active online presence, and build an engaged audience.

Skill Development:

Practicing video editing on a monthly basis allows you to refine your skills and explore different techniques. With each project, you can experiment with new editing styles, transitions, effects, and storytelling methods, ultimately enhancing your abilities.

Creative Expression:

Video editing provides a platform for creative expression. Through the process, you can convey your ideas, emotions, and messages in a visually appealing and impactful manner. Monthly projects offer regular opportunities to explore different themes and experiment with various storytelling approaches.

Portfolio Building: Charge for video editing

Consistently working on video editing projects allows you to build a diverse and impressive portfolio. A well-curated portfolio showcases your growth, expertise, and versatility to potential clients or employers, increasing your chances of securing future projects or job opportunities.

Feedback and Improvement:

Sharing your monthly video projects with others, such as online communities or social media platforms, opens the door to valuable feedback. Constructive criticism and suggestions from viewers or fellow editors can help you identify areas for improvement, refine your skills, and enhance the quality of your work over time.

Networking Opportunities:

Engaging in monthly video editing projects expands your network within the creative community. As you share your work and connect with others who have similar interests, you can collaborate on future projects, receive referrals, or gain exposure to new opportunities.

Enhanced Technical Proficiency:

The more you practice video editing, the more familiar you become with the software, tools, and techniques involved. Regular projects help you develop a deeper understanding of video editing software capabilities, shortcuts, and advanced features, which can significantly improve your efficiency and productivity.

Personal Growth and Satisfaction:

Completing monthly video editing projects provides a sense of accomplishment and personal growth. Each project presents new challenges to overcome, enabling you to learn from mistakes, adapt, and push your creative boundaries. This continuous progress contributes to a rewarding and fulfilling experience.

Bulk video editing charges:

You can get a decent profit margin on monthly projects. on leisure time to roam for searching projects, your time properly serves on video editing. You can work 8 hours daily with an average price of 25$ to 50$ per hour (If you are an expert in Premiere Pro as well as After Effects. You can easily estimate your monthly revenue.

Video editing terms

  1. Timeline: The area in the video editing software where you arrange and edit your video clips, audio, and other media elements in sequential order.
  2. Clip: A portion of video footage or audio that is imported into the editing software and used to create the final video.
  3. Cut: The process of removing a portion of a video clip. It can be a simple removal or a more complex editing technique to transition between different shots.
  4. Trim: The process of adjusting the in-point (start) and out-point (end) of a video clip to remove unwanted parts or create precise edits.
  5. Transition: A visual effect or technique used to smoothly move from one video clip to another, such as fade in/out, dissolve, wipe, or slide.
  6. Keyframe: A specific point in the timeline where you can set properties, such as position, scale, opacity, or effect parameters, to change over time. Keyframes enable animations and transformations in video editing.
  7. Effects: Enhancements or modifications applied to video clips, such as color correction, filters, motion effects, text overlays, or visual effects.
  8. Audio Mixing: The process of adjusting the volume levels, adding background music, sound effects, or voiceovers, and balancing audio elements in a video to create a cohesive and professional sound.
  9. Rendering: The process of exporting the edited video project into a playable or shareable format, such as MP4, MOV, or AVI.
  10. Export Settings: The configuration options for the output video file, include resolution, aspect ratio, frame rate, codec, and bitrate.
  11. B-roll: Additional footage that is used to supplement or enhance the main footage. B-roll is often used to provide context, cover transitions, or add visual interest.
  12. Color Grading: The process of adjusting and enhancing the color and tone of a video to achieve a specific look or mood. It involves modifying brightness, contrast, saturation, and other color parameters.

These are just a few terms commonly used in charge for video editing. There are many more technical and specialized terms depending on the software and techniques used.

learn WordPress

How long does it take to learn WordPress? No 1 Best Guide

WordPress is a powerful content management system (CMS) that powers over 45% of all websites on the internet. Its user-friendly interface and extensive customization options make it a popular choice for individuals and businesses looking to create and manage their websites. If you’re considering learning WordPress, you might be wondering how much time it will take to become proficient in using this versatile platform. In this blog post, we’ll explore the factors that affect the learning curve of WordPress and provide some guidance on the time it typically takes to learn WordPress.

Basic Concepts:

Before diving into WordPress, it’s helpful to have a basic understanding of some of the terminologies such as HTML, CSS, Domain, and Web Hosting. If you’re already familiar with these concepts, you’ll have a head start in learning WordPress. However, if you’re new to these concepts, let me try to explain these..

Domain:

The domain is the name or address of your website which is specialized or only dedicated to you in the world specifically. For example, my domain name is “msyeditor.com“. Domain contains two portions before dot refers to your site niche or after dot refers to the network i.e [ .co .net .edu .org ]

You have to be very precise and to the point while selecting a domain name. I always prefer domain name which has any sort of search volume ( in keyword research tool )

Web Hosting

Web hosting is a process of keeping the website on the drive or space usually known as Servers. The servers have the ability to keep working 24/7 and that is supposed to be good hosting having 99.99% of uptime. There are a lot of hosting providers having great reviews and serve their best.

HTML

Html known as (Hyper text markup language) is the basic programming language used in every kind of website. You can say that the basic structure of a website stays on HTML.

“At the beginning, there is no need to learn HTML properly if you are just a blogger”

But you have to know about the header, body and footer of the HTML because sometimes you have to paste code in that.

CSS

Cascading Style Sheets (CSS), usually used for styling, animations and to beautify websites to attract viewers. You should have basic knowledge of HTML to start learning CSS.

How long does it take to learn WordPress?

Solely depends on the purpose that:

“Are you selecting the developer side or you want our own content to be published”

Let’s overview both terms

Learn WordPress For Freelancing

In today’s digital era, freelancing has become an increasingly popular career choice. With the rise of remote work and the gig economy, freelancers have found immense opportunities to showcase their skills and earn a living independently. If you are dedicated then 3 months are more than enough to learn WordPress including practice. One of the most valuable skills a freelancer can possess is the ability to build and manage websites, and WordPress has emerged as the go-to platform for web development and content management. we will explore why learning WordPress is essential for freelancers and provide you with a comprehensive guide to getting started.

Why WordPress?

WordPress is a powerful content management system that has an immense range of diversity to facilitate a user in every field.

As a freelancer,

  • You can get orders on a WordPress site with just a single freelancer plugin.
  • You can make a portfolio to showcase your creativity
  • You can do affiliate marketing on the website
  • You can learn different page builders to solve the issues of clients.

One of the most easiest and remarkable page builders such as “Elementor” has many customizable options. You have to purchase the Pro version at once and use up to 25 websites

Our main goal is to earn, so all suggestions are made from that perspective

Benefits of Learning WordPress for Freelancers

  1. Expanding Your Service Offerings: By mastering WordPress, you open the doors to a plethora of freelancing opportunities. You can offer web design, development, and maintenance services to clients who require a strong online presence.
  2. Client Demand: Businesses and individuals are constantly seeking professional help to create and manage their websites. WordPress expertise puts you in high demand, as clients are often familiar with its reputation and capabilities.
  3. Flexibility and Independence: Learning WordPress enables you to work as a freelance web developer or designer, giving you the freedom to choose your projects, set your rates, and work remotely from anywhere in the world.

Getting Started with WordPress

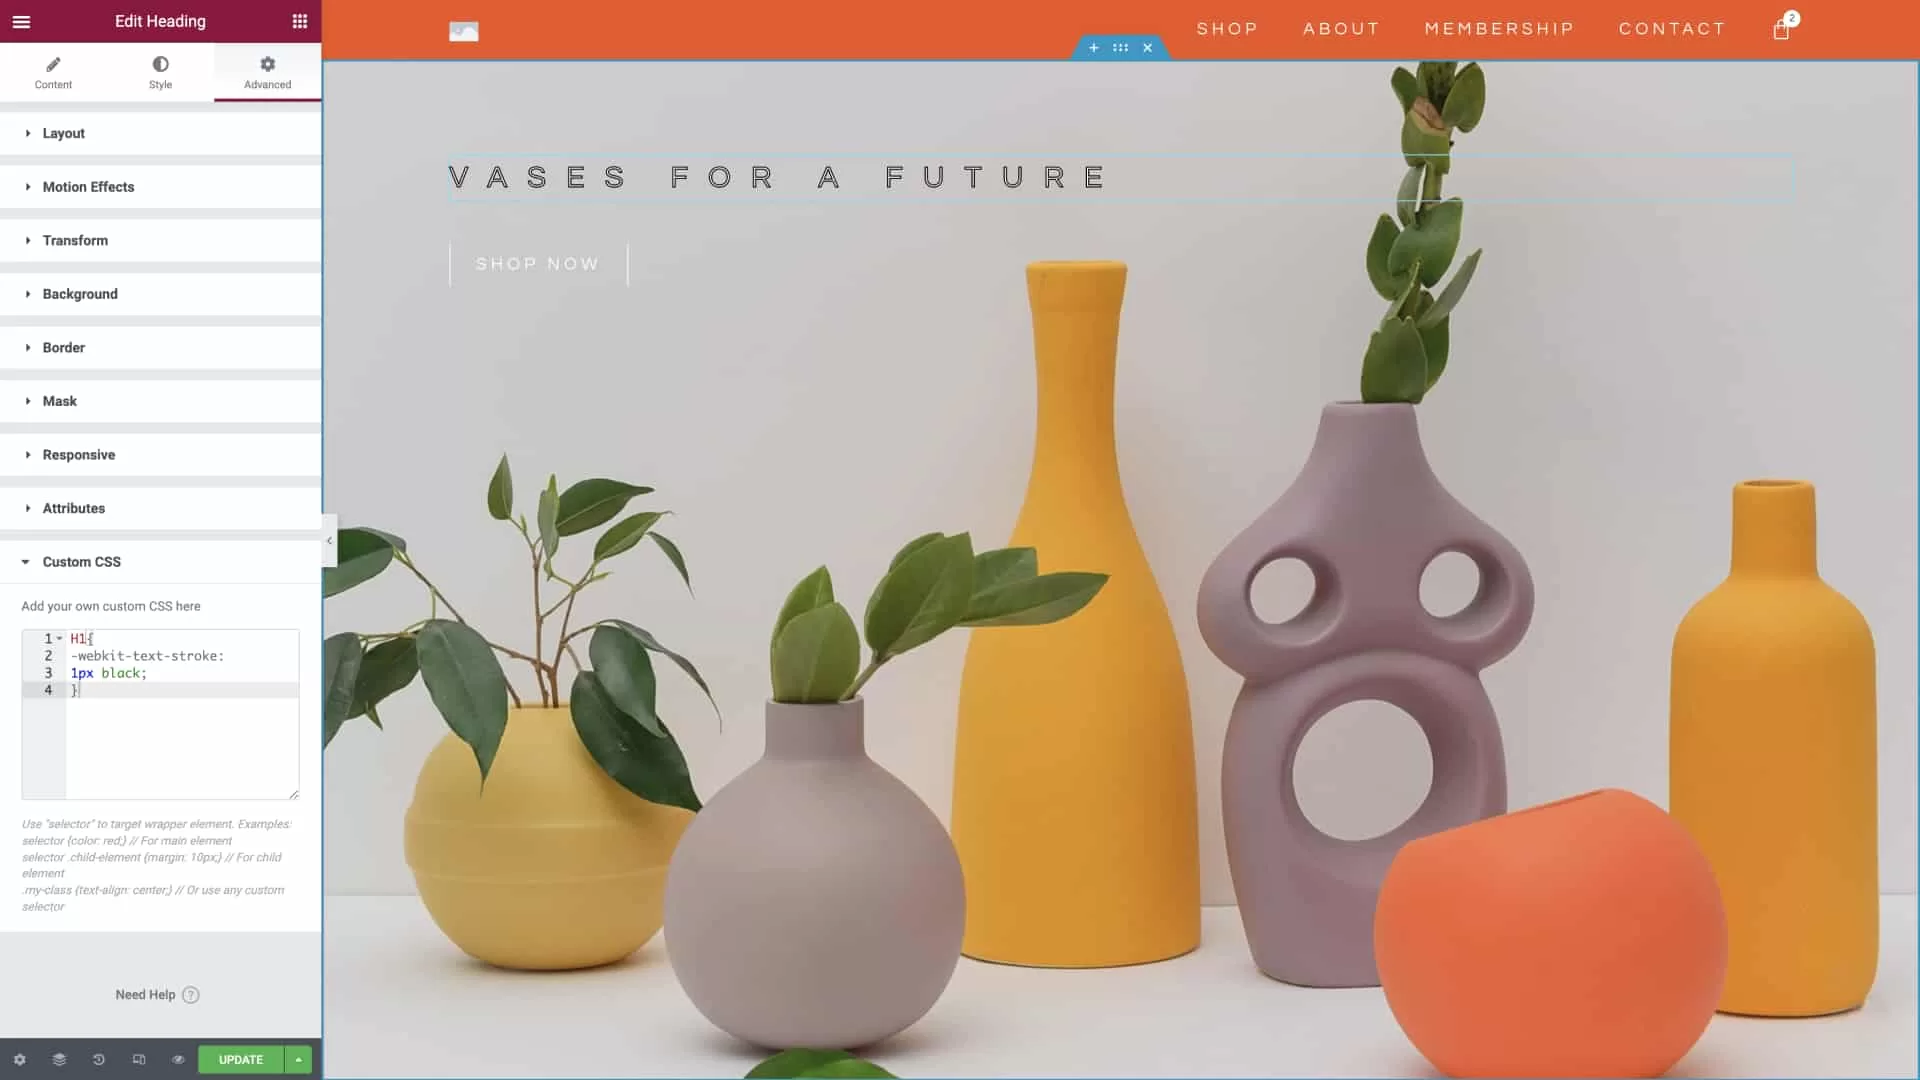
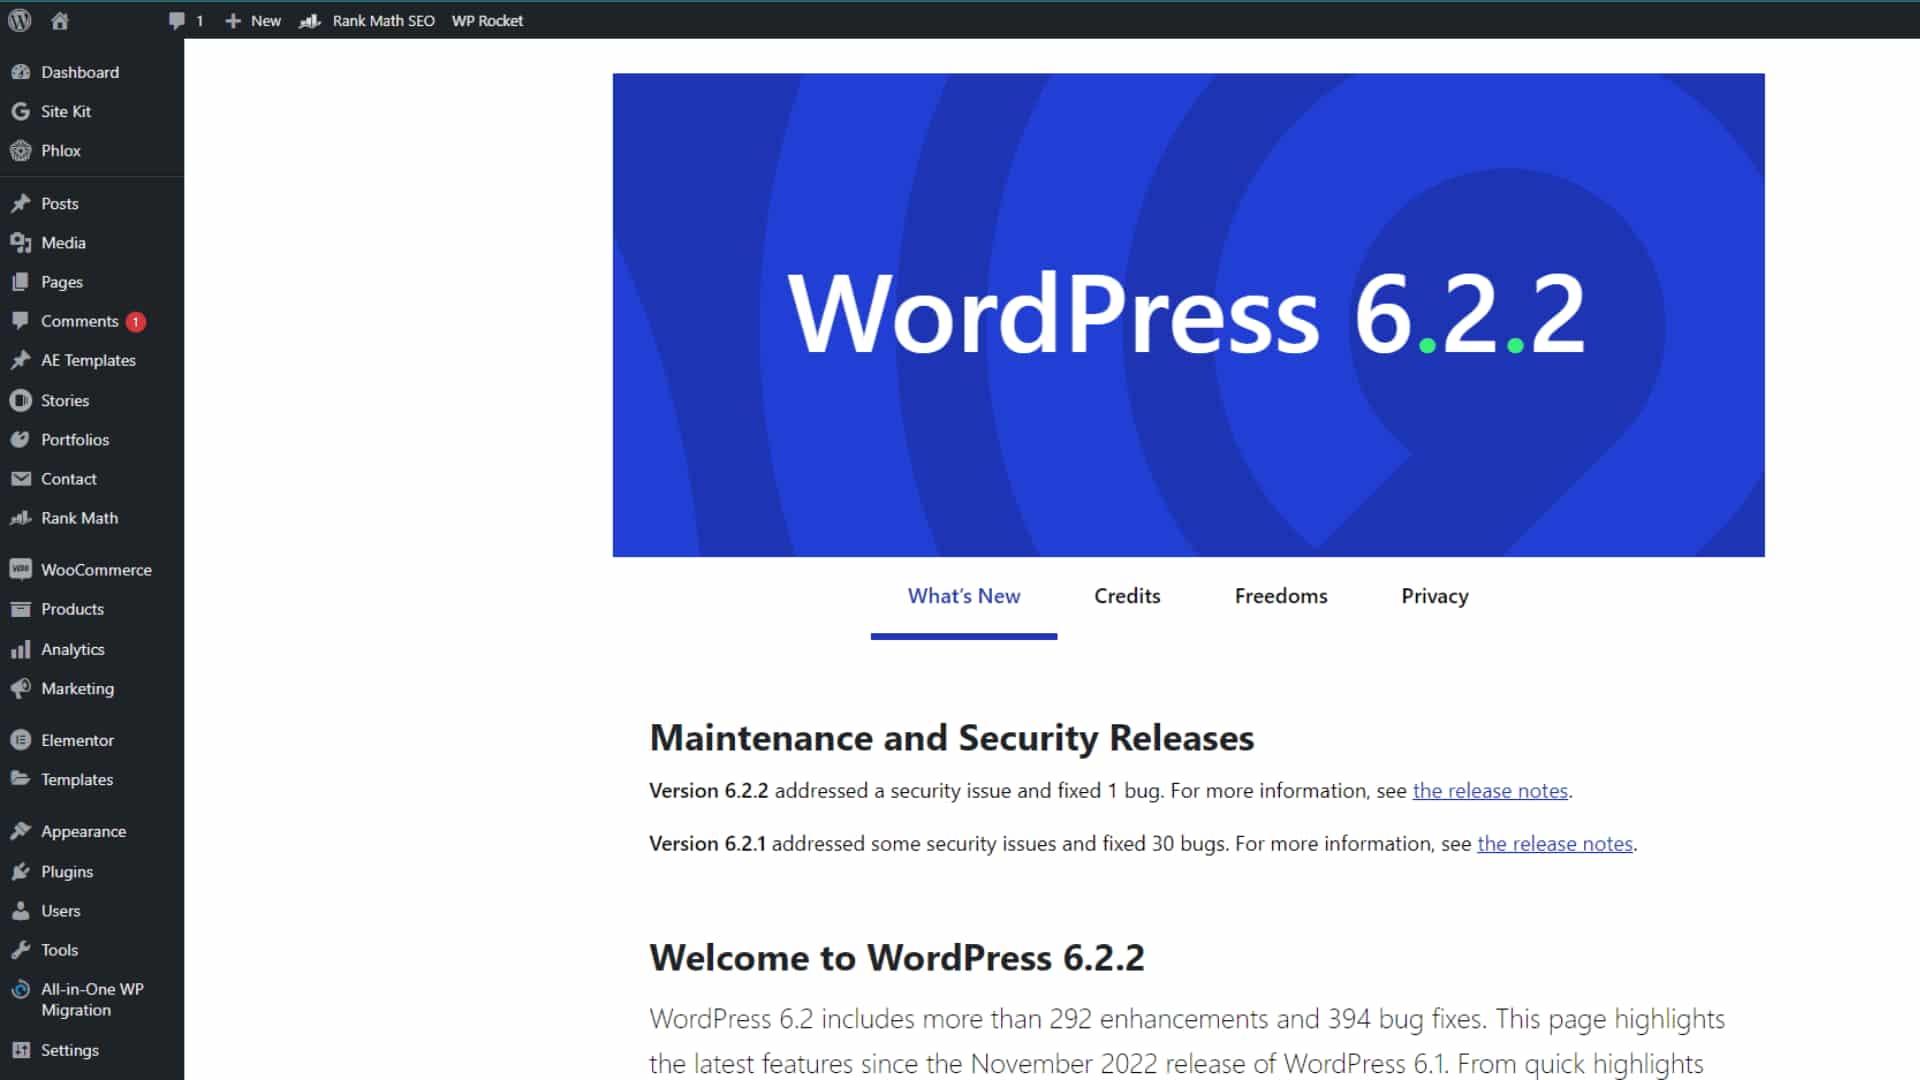
  1. Familiarize Yourself with the Basics: Start by understanding the fundamentals of WordPress. Explore its features, including the dashboard, posts, pages, themes, and plugins. Take advantage of free resources, such as WordPress.org and the official WordPress Codex, to learn the basics.
  2. Setting Up a Local Development Environment: Install a local server environment like XAMPP or WAMP on your computer to create a testing environment for WordPress. This allows you to experiment, build, and modify websites without affecting live sites.
  3. Learn HTML, CSS, and PHP: While you don’t need to be an expert in these languages, having a basic understanding of HTML (Hypertext Markup Language), CSS (Cascading Style Sheets), and PHP (Hypertext Preprocessor) will significantly enhance your ability to customize WordPress themes and templates.
  4. Explore Themes and Plugins: WordPress offers a vast library of free and premium themes and plugins. Familiarize yourself with popular options and experiment with different themes to understand their features and functionalities. Learn how to install and customize plugins to add extra functionality to websites.
  5. Practice Building Websites: Create a sandbox website to practice your skills. Experiment with various themes, customize layouts, add content, and explore different plugins. Building your own portfolio website is an excellent way to showcase your abilities to potential clients.
  6. Join Online Communities and Forums: Engage with the vibrant WordPress community through forums, online groups, and social media platforms. Participate in discussions, ask questions with attached screenshots to resolve queries, and learn from experienced professionals.
  7. Learn SEO and Security Best Practices: Enhance your learn WordPress skills by understanding search engine optimization (SEO) techniques to improve website visibility and security measures to protect websites from potential threats.

How to get orders

There are multiple freelancing sites such as Fiverr, Upwork, freelancer, and People Per Hour. You can also get orders from Social media sites such as Facebook, Quora, Instagram, and Twitter by posting your service details. You can also sell your services by letting them learn WordPress.

First solve there queries guide them about your services, provide free development for 2-3 clients and then charge for your services.

msyeditor

Learning WordPress For Blogging

Blogging is a great business and career. If you know how to surpass in that field then you will be a champion. There are some tips and tricks if you follow them you will become a good blogger.

There is no time restriction such as “Learn WordPress For Freelancing”. You should start from the day first after getting basic knowledge of keyword research, WordPress dashboard, Post section and that’s it. The first 10 blog posts should target <200 search volume (USA) and less than 20 KD (keyword density). Then go for a higher search volume for the next 10 posts such as <5000 (USA). Then learn about CPC and its importance in keyword research

In the WordPress learning phase

  1. Creating Compelling Content: Content is king in the world of blogging. WordPress provides a user-friendly editor that enables you to craft captivating blog posts with ease. Learn the basics of formatting, inserting media, and optimizing your content for SEO. Use headlines, subheadings, and bullet points to enhance readability. Incorporate relevant keywords, including our focal keyword “learn WordPress,” to boost your blog’s visibility in search engines.
  2. Optimizing Your Blog for SEO: To attract a wider audience, it’s crucial to optimize your WordPress blog for search engines. WordPress offers several SEO plugins like Yoast SEO and All in One SEO Pack that simplify the process. Optimize your blog’s meta titles, descriptions, and URLs to ensure they contain relevant keywords. Focus on building quality backlinks and interlinking your blog posts to improve search engine rankings.
  3. Engaging Your Audience with Widgets: Widgets are small, customizable modules that can be added to your blog’s sidebar, footer, or other widget-ready areas. They enhance user engagement by displaying dynamic content such as recent posts, social media feeds, or a newsletter signup form. Explore the extensive widget library in WordPress and choose widgets that align with your blog’s goals and user preferences.
  4. Enhancing User Experience with Navigation Menus: Navigation menus play a vital role in helping visitors explore your blog effortlessly. WordPress allows you to create multiple menus and customize their appearance and location. Create clear and intuitive menus that organize your content logically, making it easier for users to

Learning Resources:

The availability of resources to learn WordPress plays a significant role in the speed of your WordPress learning journey. Fortunately, there are numerous tutorials, online courses, forums, and documentation available that cater to users of all skill levels. Taking advantage of these resources can significantly expedite your learning process.

Purpose and Complexity of the Website: Learn WordPress

The purpose and complexity of the website you intend to create will influence the learning curve for WordPress. If you’re planning to build a simple blog or personal website, you can start with the basics of WordPress and gradually learn more advanced features as you go along. However, if you’re aiming to develop a complex e-commerce site or a custom-designed business website, it will require a deeper understanding of WordPress, including theme development, plugins, and more advanced functionalities.

Time Dedication:

The time you can dedicate to learn WordPress also affects the learning curve. Learning WordPress is an ongoing process, and it’s best approached with consistency and practice. Allocating a regular schedule for learning and experimenting with WordPress will yield better results than sporadic efforts. While the actual time required varies from person to person, committing a few hours per week over a period of several months is a reasonable estimate for acquiring a solid foundation in WordPress.

Prior Experience: Learn WordPress

If you already have experience with other CMS platforms or programming languages, you may find it easier to grasp WordPress concepts. Many principles and techniques from other CMSs can be applied to Learn WordPress, which can help streamline your learning process.

Understanding the Basics: Learn WordPress might seem overwhelming at first glance, but learning its fundamentals doesn’t require an extensive amount of time. Getting acquainted with the core concepts and functionalities can be achieved within a few hours or a couple of days, depending on your familiarity with similar platforms. Here are the key aspects you need to grasp initially:

Learn WordPress
  1. Installation: Understand how to install WordPress on your local machine or web server.
  2. Dashboard: Familiarize yourself with the WordPress dashboard, where you’ll manage your website’s content, appearance, and settings.
  3. Themes: Learn how to choose, install, and customize themes to define the visual appearance of your website.
  4. Plugins: Explore the vast library of plugins that extend WordPress’s functionality, and know how to install and activate them.
  5. Posts and Pages: Get acquainted with creating and editing blog posts and static pages.
  6. Media Management: Learn how to upload and manage images, videos, and other media files.
  7. Menus and Navigation: Understand how to create menus and set up navigation for your website.
  8. Widgets and Sidebars: Explore the use of widgets and sidebars to enhance the functionality and layout of your website.

Factors Influencing Learning Duration: While the basics can be grasped relatively quickly, becoming proficient in Learn WordPress involves more than just surface-level knowledge. Several factors influence the duration it takes to learn WordPress:

  1. Learning Style: Some people prefer hands-on learning and can pick up WordPress skills faster through practical experimentation, while others may prefer structured courses or tutorials.
  2. Time Commitment: The more time you dedicate to learn WordPress and practice it, the faster you’ll progress. Consistency is key.
  3. The Complexity of Projects: The complexity of the website or project you aim to build with WordPress can affect the learning duration. Advanced features like e-commerce integration, custom theme development, or complex functionality may require more time to master.

Tips to Expedite Your WordPress Learning Journey:

If you’re eager to accelerate your WordPress learning process, consider the following tips:

  1. Utilize Online Resources: Take advantage of the vast array of free and paid online resources available. WordPress.org, YouTube tutorials, blogs, and forums are excellent sources for learning new skills.
  2. Enroll in Courses: Joining structured online courses or attending workshops can provide a systematic learning path, helping you grasp advanced concepts efficiently.
  3. Practice Regularly: Create a sandbox environment or use a local installation of WordPress to experiment and practice your skills. The more you practice, the more confident you’ll become.
  4. Engage in Communities: Participate in WordPress forums, online communities, and social media groups to interact with other learners and professionals. Seek guidance, ask questions, and share your experiences to learn WordPress better.
  5. Work on Real Projects: Apply your knowledge by working on real-life projects. Building websites for yourself or others can enhance your skills and offer valuable hands-on experience.
  6. Stay Updated: WordPress continually evolves, so staying updated with the latest features, trends, and best practices is crucial. Follow reputable WordPress blogs and subscribe to relevant newsletters to keep yourself informed.

Our Opinion: Learn WordPress

Every person should have 2 WordPress websites. One of the domain he must acquire of his own name to build his personal branding. He should write a blog post about his specific niche and his own interests.

Other Domains should purchase any micro niche category to excel in less time. If you play in a less competitive area there are many chances to rank on the first page in a month. Do proper keyword research and publish articles in a scheduled manner.

facebook lawsuit

Facebook Scrollers can now take part in Facebook lawsuits: $725M Share

Facebook has agreed to pay a $725 settlement in a Facebook lawsuit to all those Facebook users who meet the given eligibility criteria. Now you can also claim your share, and if you haven’t submitted your form then don’t delay it, only four months are there.

Meta, the Facebook parents company, is sharing $725 million to settle a lawsuit after the major Facebook–Cambridge Analytica data scandal.

Cambridge Analytica is the British political consulting firm that gets access to millions of Facebook users for political purposes. This firm reached the personal information of millions of Facebook users to have their political advertisements.

The data was obtained using an app, ‘This is Your Digital Life’, that has collected information from about 87 million Facebook profiles. Their main focus was to help the presidential campaign of that time in 2016 through their analytics.

After two years, In 2018, It was disclosed that the personal information of many U.S. people has been got accessed by this firm.

Mark Zuckerberg, The CEO of Facebook personally apologized for the data harvesting and agreed to pay the fine.

In 2018, Cambridge Analytica paid Facebook for having access to their users’ data which was then used by them for voters in 2016.

Million Dollar Settlement – Facebook lawsuit

When Facebook users stood against Facebook for sharing their data and other personal information with a third party i.e. advertising agencies (Cambridge Analytica) or some other data collectors and brokers then Facebook’s parents’ company, Meta decided the class-action settlement of $725 million to all its U.S. users for privacy violation.

Who Can Apply?

Not all Facebook users can claim their money, rather specific users or US Facebook users can do so.

Individuals who were affected by Facebook’s violation of privacy laws and had their personal data misused are eligible to apply for the $725 million settlement. This includes Facebook users who had their data harvested by third-party apps without their consent between 2015 and 2018.

  • U.S. people who used Facebook from 24 May 2007 to 22 December 2022 are eligible to put in the claim.
  • If they have an active account between these years then they can also claim but not for more than one account.
  • It doesn’t matter if your account is not active now, rather it depends if you used Facebook during that specific time.
  • You must be a resident of the United States or its territories.
  • You must have been impacted by the alleged violation of Facebook’s privacy policies or data misuse practices, which may include having your personal information obtained or misused by third-party applications or advertisers without your consent.

Form Requirement

The specific requirements for the forms needed to file a claim for a Facebook lawsuit settlement are

  • Personal information: You may need to provide your full name, address, email address, and phone number.
  • Facebook account information: You may need to provide your Facebook account name or username, as well as any other relevant account information.
  • Documentation of harm: You may need to provide documentation or evidence of the harm you suffered as a result of the alleged privacy violation or data misuses, such as evidence of identity theft, financial loss, or other damages.
  • Claim certification: You may need to certify that you are eligible to file a claim and that the information you provided is accurate and complete.
  • Methods of payment: The way you prefer to get your claim i.e. PayPal, Venmo, etc

How to apply? – Facebook lawsuit

That entitled Facebook users can apply either through applying online form or by mailing their form to the address provided by the officials;

Facebook Consumer Privacy User Profile Litigation, c/o Settlement Administrator, 1650 Arch Street, Suite 2210, Philadelphia, PA 19103.

How much money will you get?

The amount of money an eligible person may be awarded from the Facebook lawsuit settlement depends on various factors, including the number of eligible claimants and the specific settlement agreement. In some cases, the settlement may involve a fixed amount of compensation for each eligible claimant, while in others, the compensation may be determined based on the actual harm suffered by the claimant.

For example, in the case of the $725 million Facebook lawsuit settlement, eligible claimants who were impacted by the alleged violation of Facebook’s privacy policies or data misuse practices may be entitled to receive a portion of the settlement fund. The exact amount each claimant may receive will depend on various factors, including the number of eligible claimants who file a claim and the extent of the harm suffered by each claimant.

It is important to note that the settlement agreement may also include other forms of relief or compensation, such as changes to Facebook’s data privacy practices or other injunctive relief.

The exact amount to be given to the users is not decided or fixed it all depends on the number of accounts of the people who file their claims.

And it also depends upon the time span of the account. The more years your account would have been active or remained active during those mentioned years (2007-2022) the more money you will able to claim.

Deadline to file a claim

If you haven’t filed a claim yet you are not so late but you are left with only four months for a Facebook lawsuit. As the deadline marked is 25 August 2023. So, go to the official claim website and fill out the requirements, and do submit this before the marked time.

Court Hearing – Facebook lawsuit

Court has the final hearing of this $725 million Facebook lawsuit settlement on 7 September 2023. The appropriate person will be awarded accordingly.

Class action lawsuit against Facebook

A class action lawsuit has been filed against Facebook by the Federal Trade Commission (FTC) and attorneys general from 48 states and territories. The lawsuit accuses Facebook of engaging in anti-competitive behavior by acquiring potential competitors like Instagram and WhatsApp and using its dominant market position to stifle competition.

The class action lawsuit alleges that Facebook’s actions have resulted in a lack of choice for users and higher advertising prices for businesses. If found guilty, Facebook may be forced to divest Instagram and WhatsApp and potentially face other restrictions on its business practices. This could have significant implications for users and businesses that rely on these platforms for social media marketing and communication.

If you believe you have been impacted by Facebook’s anti-competitive behavior, you may be eligible to join the class action lawsuit. By joining the lawsuit, you may be able to recover damages for any harm caused by Facebook’s actions.

It’s important to stay informed about the Facebook class action lawsuit and its potential impact on the social media industry and the broader economy. If you have any questions or concerns about your rights as a consumer or business owner, it may be helpful to consult with a legal professional.

Facebook Privacy Lawsuit

Facebook has faced several privacy lawsuits over the years, including a high-profile case in 2018 involving the data-mining firm Cambridge Analytica. The lawsuit alleged that Facebook failed to adequately protect the personal information of millions of users, which was later used by Cambridge Analytica for political advertising.

However, Facebook continues to face privacy Facebook lawsuits from users and consumer advocacy groups. In one ongoing Facebook lawsuit, Facebook is accused of violating user privacy by using facial recognition technology without consent. The lawsuit alleges that Facebook’s use of facial recognition technology violates Illinois state law, which requires companies to obtain explicit consent before using biometric data.

Record Breaking Fine

In 2019, Facebook settled a privacy Facebook lawsuit with the Federal Trade Commission (FTC) for a record-breaking $5 billion fine. As part of the settlement, Facebook agreed to implement stronger privacy protections for its users and to create a new privacy committee to oversee the company’s privacy practices.

Conclusion

If you believe your privacy has been violated by Facebook or any other company, it may be helpful to consult with a legal professional to understand your rights and options for legal recourse. It’s important to stay informed about privacy issues and take steps to protect your personal information online. This may include regularly reviewing your privacy settings on social media platforms and being cautious about sharing sensitive information online.

If you are new to our website and want to learn how to earn money and become wealthy then please subscribe to our community blog msyeditor.com

If you want to learn How to switch Facebook’s classic page then click.

Cosmetic photography

7 Tips For Better Cosmetic Photography

Cosmetic photography allows you to highlight the physical features of your products and highlight them in a way that will really make your products stand out from the rest, and when done correctly, it can also give you an extra edge against your competitors.

But if you’re going to be working with cosmetic photography, then it’s important that you do everything correctly because it’s commercial photography, and you have to be wakened at every step! when doing background selection, retouching with water spray, having a sandy bottom to give the ambiance of a beach and you are doing a makeup of cosmetic kit item.. not a model! without looking unprofessional or giving off the wrong message about your brand. Here are 7 tips for better cosmetic photography.

As a photographer specializing in cosmetic photography, capturing the beauty and essence of your subject is of the utmost importance. With the rise of social media and the increasing emphasis on visual content, having high-quality images is essential for any cosmetic brand or individual looking to promote their products or services.

Cosmetic photography requires a skilled hand and an eye for detail. It is not simply a matter of snapping a picture; it involves careful attention to lighting, composition, and the subject’s features. Whether you are capturing the perfect shade of lipstick or highlighting the intricate details of a skincare product, each photo must convey the essence of the product and its unique benefits.

As a photographer, it is important to understand the needs and goals of your client. Are they looking to promote a specific product line, highlight the results of a particular treatment, or simply showcase the beauty of their brand? By understanding these goals, you can tailor your approach and create images that truly capture the essence of their vision.

One key aspect of cosmetic photography is lighting. Proper lighting can make all the difference in highlighting the subject’s features and creating a natural, flattering look. Whether you are working with natural light or artificial lighting, it is important to experiment with different setups and angles to find the perfect look.

Another essential aspect of cosmetic photography is post-processing. This is where you can really bring out the beauty of your images by adjusting color, contrast, and other settings to create a polished, professional look. This process requires a keen eye and a deep understanding of editing software such as Adobe Photoshop or Lightroom.

When it comes to promoting your cosmetic photography services, SEO optimization is crucial. By strategically incorporating your target keyword, “cosmetic photography,” throughout your website and online content, you can improve your search engine rankings and attract more potential clients. However, it is important to avoid overusing your keyword, as this can actually have a negative impact on your rankings.

In conclusion, cosmetic photography is a specialized field that requires a unique blend of technical skill and artistic vision. By understanding the needs and goals of your clients, experimenting with lighting and post-processing techniques, and optimizing your content for SEO, you can establish yourself as a top-notch cosmetic photographer and attract a steady stream of clients who appreciate your attention to detail and dedication to quality.

1) Camera settings for better results


Amazing photography can cash your commercial product. Shooting in natural light is the best option for makeup photography, but you can also use studio lights. Set your camera to shoot raw, and use a tripod to avoid blurry images. Shoot at an aperture of ƒ/8 or higher to minimize distortion and lens flare.

If you’re shooting with a DSLR, set your shutter speed to 1/125th or higher and ISO between 200-400. You should also have some white balance options on hand so that you can make adjustments if necessary.

When shooting makeup photos, focus on capturing the entire face as well as close-ups of details like eyes, lips, and skin tone. You’ll want to take a lot of different pictures while experimenting with angles, lighting, and backgrounds to ensure that you get all of your desired shots.

2) Natural lighting Cosmetic photography


Natural lighting is the most important thing to think about when doing cosmetic photography. The best time to do this type of photography is in the morning or evening since these are the times of day when sunlight is softer and more diffuse.

You should also make sure that there is no harsh backlighting from behind your subject, so keep your subject away from windows or doors. Use a reflector board for a nice even light on all sides of your subject’s face. Finally, you want to make sure that there are no shadows being cast on your subject’s face as well!

3) White background, black background


Working with a white background is preferred for cosmetic photography as it’s more neutral and doesn’t distract from the product. It’s also great for starting off makeup artists that want to photograph their work. Some makeup artists who don’t feel comfortable in front of a camera can still take good pictures by using a black background like in this example

The right equipment should also be used when taking photographs- makeup should be professionally airbrushed, lighting should be consistent and correct, and the camera settings must always be set correctly to produce good quality photos. A new camera may also need to be purchased or rented if you don’t have access to professional equipment.

4) Flatlay or not flatlay? That’s the question.


No one can dispute the power of a good photo. A beautiful photo can be the difference between having a successful campaign or not. With so many ways to take photos these days, it’s important to know what you’re doing when it comes to taking pictures. Here are some tips for better cosmetic photography:

  • Background: The background of your photo is an integral part of the overall feeling that is conveyed by your image. It should be aesthetically pleasing and inoffensive, with no elements that distract from the subject matter at hand.
  • Lighting: Dim lighting should be avoided as it will cast shadows on your subject and make them appear gloomy or sickly.

5) Editing, editing, editing!


The first tip for better cosmetic photography is about lighting. If you look at any beauty magazine or blog, they will tell you that natural light is best. It’s true! Get out of the studio and take your shots outside as much as possible to get more natural looking skin tones.

Lighting can be a difficult thing to master when we are doing cosmetic photography and there are a few ways to help achieve the perfect shot. You could use an umbrella diffuser if you’re shooting indoors, this softens the light and creates a nice even glow around your subject’s face.

Another way is using a fill flash or using a reflective surface such as a mirror to bounce in some extra illumination into dark areas like under the eyes and under the brows. Always set your flash up off-camera to avoid harsh shadows being cast on the subject’s face which can give it an unflattering appearance.

6) Have a plan


This post will cover seven tips for better cosmetic photography. These tips are good to keep in mind while working on any type of photography, but they’re especially important when doing cosmetic photography. As with any project, preparation is key! Before you snap a single picture, make sure to:
1) Gather your equipment and put it all together before you start shooting.

2) Have a plan for the shoot and know what you want to do beforehand. Cosmetic photography is different than other types of photography because we’re not just capturing one image; we need a lot of different pictures. Make sure you take enough photos so that there’s at least one shot of every product and angle that you want, then choose the best ones after.

3) Work on creating beautiful light (especially natural light). It doesn’t matter how great your makeup skills are if the lighting isn’t flattering. The best time to shoot cosmetics would be in daylight or under artificial lights with diffusers or softboxes overhead.

7) How important is the quality of pictures?


The quality of a picture is determined by many factors, but the most important factor is how well you, as the photographer and artist, know your equipment. When I shoot beauty or glamour photography my goal is to create images that display the perfection of light and form, which translates into a professional looking photograph with a deep contrast range.

To achieve this image quality we use 2 lenses: Nikon AF-S Nikkor 24mm f/1.4G ED wide-angle lens for close up details and working within tight spaces where available natural light does not exist; Nikon AF-S Nikkor 50mm f/1.4G standard lens for portraits where I typically back up my subjects to allow them more room to work with their bodies.

For more content such as Facebook marketing kindly read this blog: new page experience

If you have any interest in football then must check Football Romeo

unpublish wordpress site

How to Unpublish WordPress Site? 3 Amazing Methods

WordPress is one of the most popular content management systems (CMS) in the world, powering over 40% of websites on the internet. Whether you’re a blogger, business owner, or developer, WordPress makes it easy to create and manage a website. However, there may be times when you need to unpublish your WordPress site or content. This could be because you’re making changes to your website or because you’re no longer using it. Many people get confused between unpublishing content or a whole site, In this article, we’ll explain how to unpublish WordPress site or unpublish WordPress content

Unpublish WordPress content

Method # 1 – Unpublish WordPress site

Step 1:Log into your WordPress dashboard

The first step in unpublishing your WordPress site is to log in to your WordPress dashboard. This is where you’ll find all the tools and options you need to manage your site. To log in, go to your WordPress site and add “/wp-admin” to the end of the URL. For example, if your site’s URL is “www.yoursite.com“, you would go to “www.yoursite.com/wp-admin“. Enter your username and password, and click “Log in”.

Step 2: Install a maintenance mode plugin

Before you unpublish WordPress site, you may want to install a maintenance mode plugin. This will display a message to your visitors that your site is under construction or temporarily unavailable. This is a great way to prevent visitors from seeing a broken or incomplete site while you work on it. There are many maintenance mode plugins available, but some of the most popular ones are WP Maintenance Mode, Coming Soon Page & Maintenance Mode, and Under Construction Page.

Step 3: Unpublish WordPress site

Once you have installed a maintenance mode plugin (if desired), you can unpublish WordPress site. To do this, go to the “Settings” menu in your WordPress dashboard and click “Reading”. In the “Reading” settings, you’ll see an option called “Site Visibility”. Click the checkbox next to “Discourage search engines from indexing this site” and click “Save Changes”. This will tell search engines not to index your site, which effectively unpublishes it.

Step 4: Notify your users

Finally, it’s a good idea to notify your users on Facebook or any other social media profile that your WordPress site is temporarily unavailable. You can do this by creating a post or page that explains why the site is offline and when it will be back up. You can also include a contact form or email address where users can get in touch with you if they have any questions or concerns.

You can temporarily take your site offline while you make changes or decide whether to keep it live. Remember to install a maintenance mode plugin to ensure your visitors see a professional message, and notify your users about the status of your site.

Method # 2

If you’re looking to unpublish WordPress site, you might be wondering what the best way to go about it is. Fortunately, the process is relatively straightforward, and we’ve put together a quick guide to help you out.

Step 1: Log in to your WordPress Dashboard

The first step in unpublish WordPress site is to log in to your WordPress dashboard. This can typically be done by visiting yourdomain.com/wp-admin and entering your login credentials.

Step 2: Navigate to the “Settings” menu

Once you’re logged in, navigate to the “Settings” menu on the left-hand side of your screen. This will bring up a list of options, including “General,” “Writing,” “Reading,” and more.

Step 3: Click on “Reading”

Next, click on the “Reading” option. This will bring up a screen where you can change your site’s visibility settings.

Step 4: Choose “Discourage search engines from indexing this site”

To unpublish WordPress site, select the option that reads “Discourage search engines from indexing this site.” This will tell search engines not to index your site, effectively unpublishing it from the web.

Step 5: Save your changes

Once you’ve made this selection, be sure to click the “Save Changes” button at the bottom of the page. This will ensure that your new settings are saved and applied to your WordPress site.

Step 6: Check that your site is unpublished

To confirm that your site is now unpublished, you can visit it in a new browser window or tab and see if it still appears in search results. If it does not, then you have successfully unpublished your WordPress site.

By following the steps outlined above, you can ensure that your site is removed from search engines and is no longer publicly accessible.

Method # 3

If you’re planning on taking down your WordPress website temporarily, you might be wondering how to unpublish WordPress site. In this method, we’ll guide you through the steps you need to take to unpublish WordPress site without losing any of your content or data.

Before we dive in, it’s important to understand the difference between unpublishing and deleting your WordPress site. When you delete your site, you’re essentially wiping all of your content and data off the internet. Unpublish WordPress site, on the other hand, simply takes your site offline temporarily while allowing you to bring it back online later.

Now that we’ve covered the basics, let’s get into the steps you need to take to unpublish WordPress site.

Step 1

Backup Your Site Before you unpublish WordPress site, it’s essential to back up all of your content and data. This step will ensure that you don’t lose any of your valuable data, and you can restore your site later with ease.

There are several WordPress plugins available that make backing up your site a breeze. Some of the popular options include UpdraftPlus, BackupBuddy, and Jetpack.

Step 2

Put Your Site in Maintenance Mode To prevent visitors from accessing your site while it’s offline, it’s essential to put your site in maintenance mode. You can do this by installing and activating the WP Maintenance Mode plugin. This plugin will display a customizable message to visitors, letting them know that your site is temporarily offline.

Step 3

Disable Your Site’s Indexing To ensure that search engines don’t index your site while it’s offline, you need to disable your site’s indexing. You can do this by going to the Settings > Reading page in your WordPress dashboard and checking the “Discourage search engines from indexing this site” box.

Step 4

Take Your Site Offline Once you’ve completed steps 1-3, you’re ready to take your site offline. You can do this by going to the Settings > Reading page in your WordPress dashboard and selecting the “A static page” option. Next, select a blank page for both your “Homepage” and “Posts page.” This step will ensure that your site is no longer accessible to visitors.

Step 5

Bring Your Site Back Online When you’re ready to bring your site back online, you can simply reverse the steps we’ve outlined above. Restore your backup, take your site out of maintenance mode, re-enable indexing, and select your desired homepage and posts page.

In conclusion, unpublishing your WordPress site is a straightforward process that requires a few simple steps. By following the steps we’ve outlined above, you can take your site offline temporarily without losing any of your valuable data or content. Remember to back up your site before unpublishing it and put it in maintenance mode to prevent visitors from accessing it while it’s offline. With these steps, you can unpublish your WordPress site with ease.

Why do we need to unpublish our WordPress site?

There are several reasons that might need to unpublish WordPress site:

  1. Making changes: You may need to unpublish your site temporarily while you make changes or updates to your content, design, or functionality.
  2. Redesigning: If you’re completely redesigning your site, you may want to take it offline until the new design is ready to be launched.
  3. Testing: If you’re testing new features or plugins on your site, you may want to unpublish it while you work on them to avoid any issues that could affect your visitors.
  4. Rebranding: If you’re rebranding your business or website, you may need to unpublish your site while you update your branding and content to reflect the new identity.
  5. Switching hosts or domains: If you’re moving your site to a new hosting provider or changing your domain name, you may need to unpublish your site temporarily while you make the transition.

Overall, unpublishing a WordPress site can be a useful tool for site owners who need to make changes or updates to their site without disrupting the user experience.